An auto-payment uses a saved payment card to pay eligible bills automatically under the settings you choose. The option is available only for participating organisations and accounts.
- Sign in at go.payreq.com.
- Open the user menu and select Manage Auto Payments.
- Select Create Auto Payment.
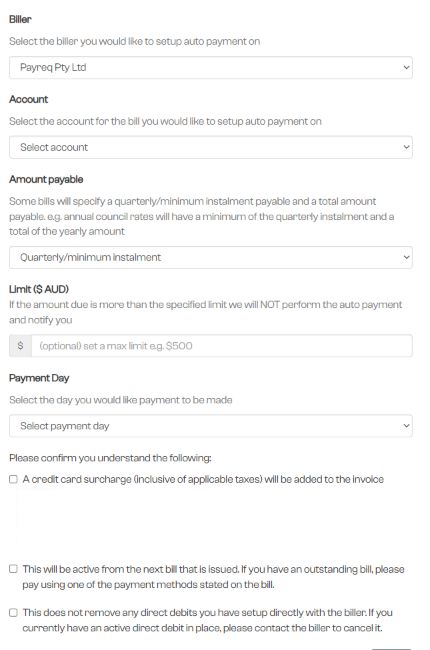
- Select an existing card. If you do not have one, Payreq opens Add Card so you can save one first.
- Choose the organisation and account to which the instruction applies.
- Under Amount payable, choose the available minimum or total amount option that you want Payreq to use.
- Set an optional Limit. Payreq will not make an automatic payment where the amount due is above that limit, and will notify you.
- Under Payment Day, choose Day bill is received or Due date of bill.
- Review any card surcharge shown and acknowledge the setup warnings.
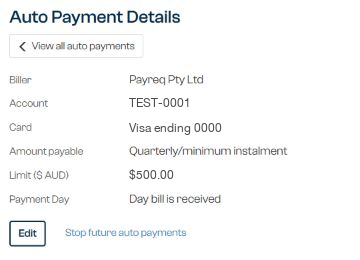
- Select Save, then review the new instruction under Manage Auto Payments.
The instruction applies from the next eligible bill issued. Pay an existing outstanding bill separately.
Creating an auto-payment in Payreq does not cancel a direct debit held by the issuing organisation. Contact the organisation if an existing direct debit also needs to be cancelled.
An auto-payment instruction is not an approval of an incorrect bill. Contact the issuing organisation if the amount or account details are wrong.
Was this article helpful?
That’s Great!
Thank you for your feedback
Sorry! We couldn't be helpful
Thank you for your feedback
Feedback sent
We appreciate your effort and will try to fix the article